
Kurulum ve ilk adımlar
Hesabınızı açtıktan sonra telefonunuzu doğrulayın, kurulum sihirbazında firma, kasa / banka ve depo bilgilerinizi girin. Ardından ürünlerinizi ve müşterilerinizi ekleyip ilk faturanızı kesmeye hazır olursunuz.
Audio narration · Click on the player for Turkish subtitles. CC button. The same steps are written and screenshotted below.
before you start
- ●Vergi levhanız yanınızda olsun: company title, tax number (or TR ID number), tax office ve açık adres.
- ●Banka hesabınızın IBAN'ı (banka adı ve logosu IBAN'dan kendiliğinden bulunur).
- ●Doğrulama kodu gelecek bir cep telefonu.
step by step
-
1
Verify your phone
Immediately after registration Verify your phone screen opens. Type the 6-digit code sent to your phone and verify'ya basın. Kod 10 dakika geçerlidir; gelmezse bir dakika sonra Resend code'i kullanın, numara yanlışsa change number.
-
 Enlarge ⤢
2
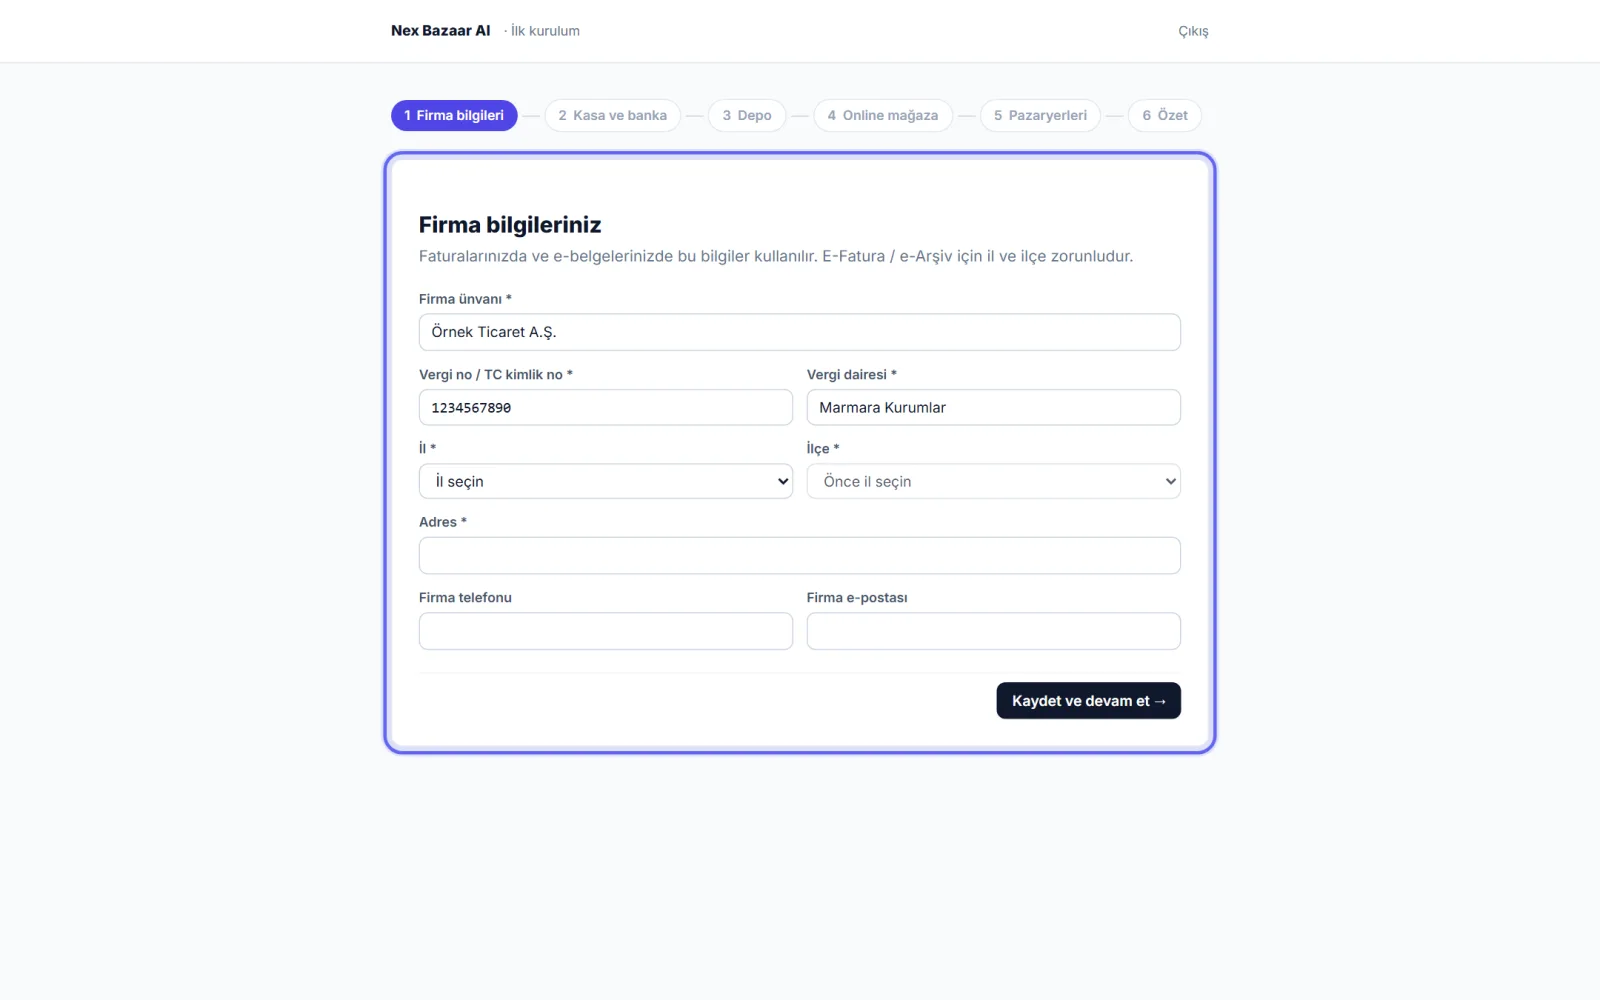
Enter company information
Your company information in step Company name, Tax number / TR ID number, Tax office, Address, Province and District It is mandatory. This information is used in your invoices and e-documents; Province and district are required for e-Invoice / e-Archive. Kaydet ve devam et → ile ilerleyin.
-
 Enlarge ⤢
3
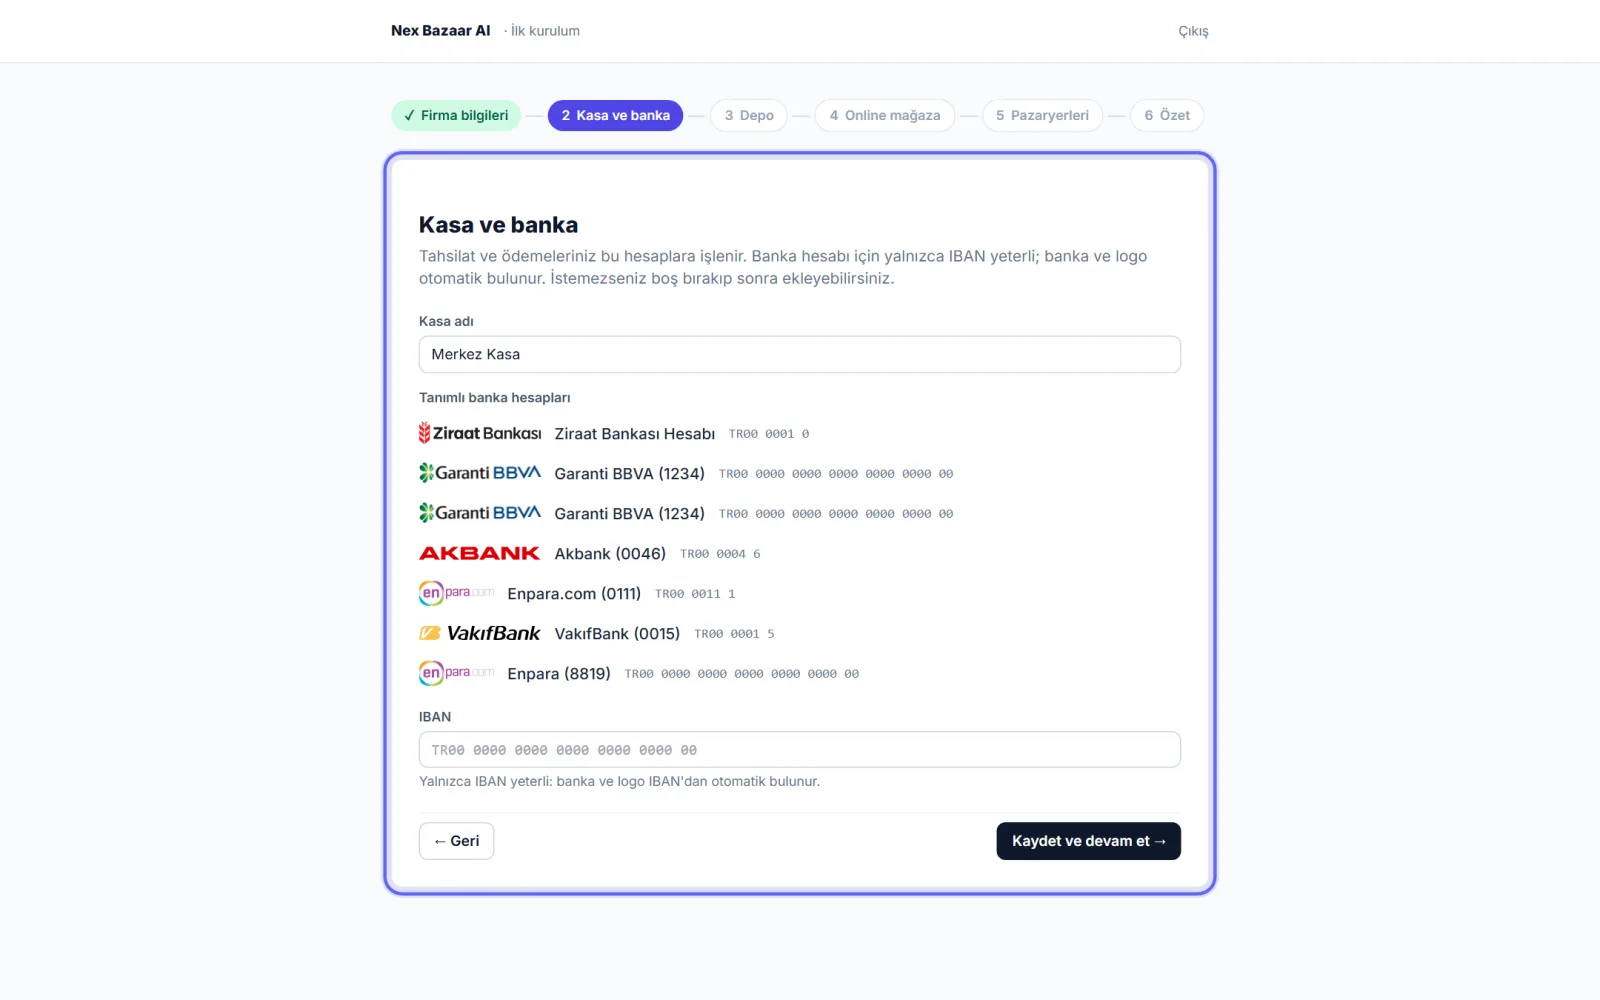
Add your cash and bank account
Safe and bank adımında nakit kasanızın adını verin ve banka hesabınızın IBAN'ını yazın. IBAN yeterlidir; banka ve logo otomatik bulunur. Başka hesapları sonra Cash Management → Cash and Banks'dan ekleyebilirsiniz.
-
 Enlarge ⤢
4
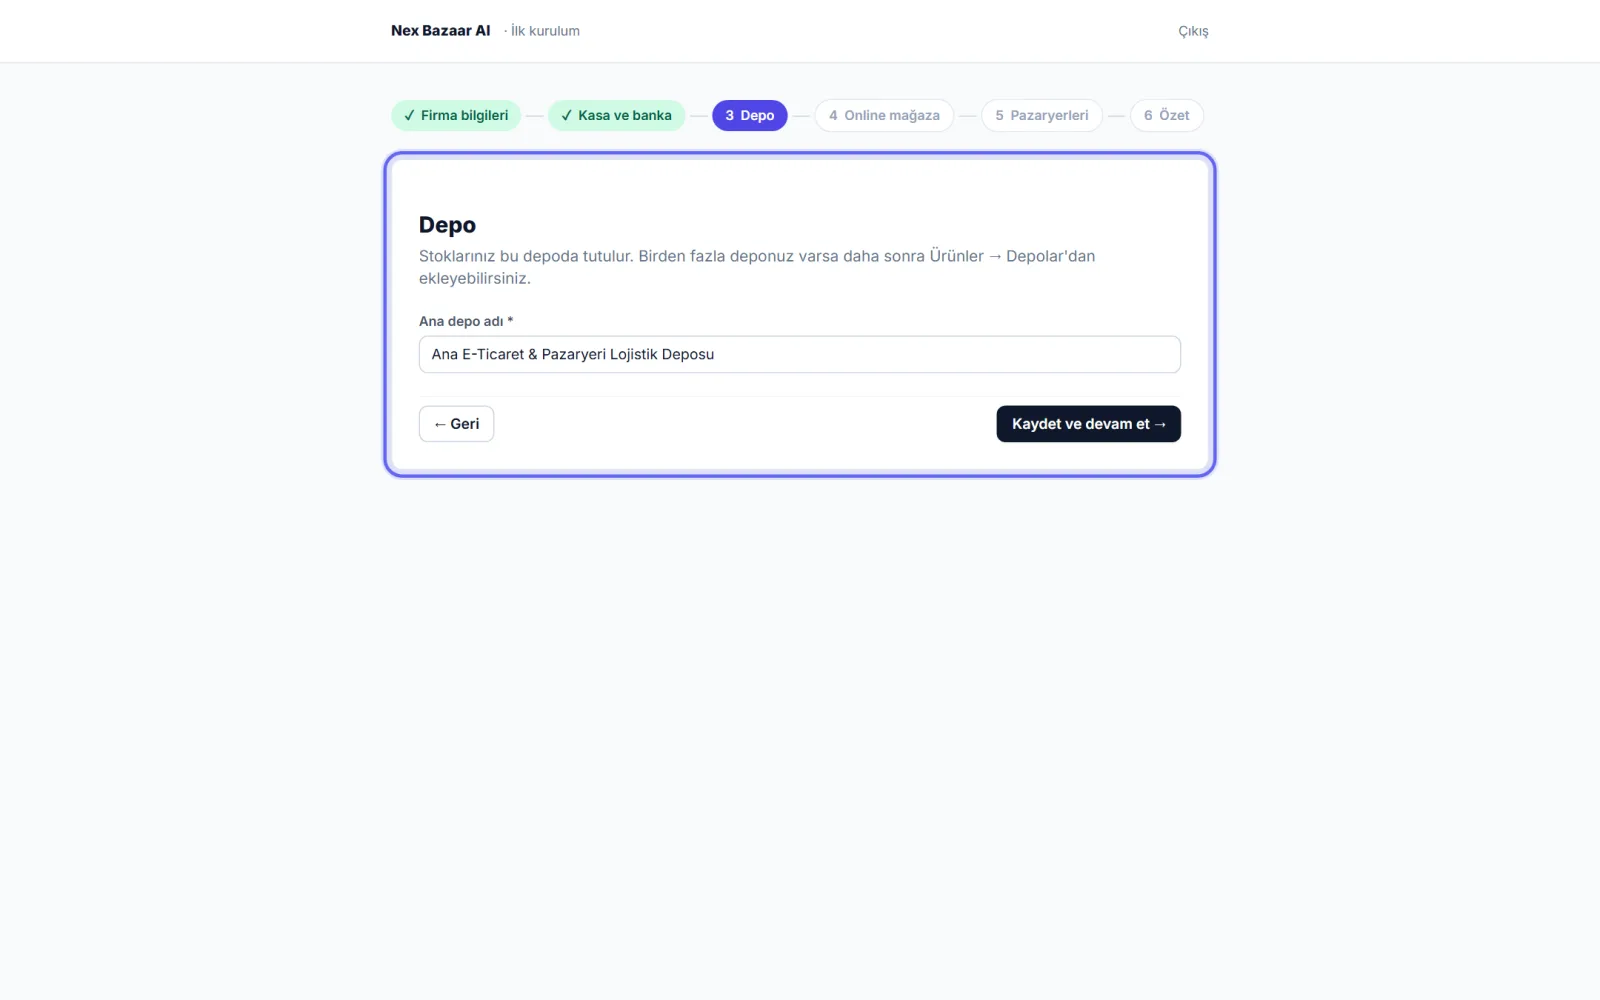
Identify your warehouse
Main warehouse nameWrite down. Your stocks are kept in this warehouse. If you have more than one warehouse then Products → Warehouses'dan ekleyebilirsiniz.
-
 Enlarge ⤢
5
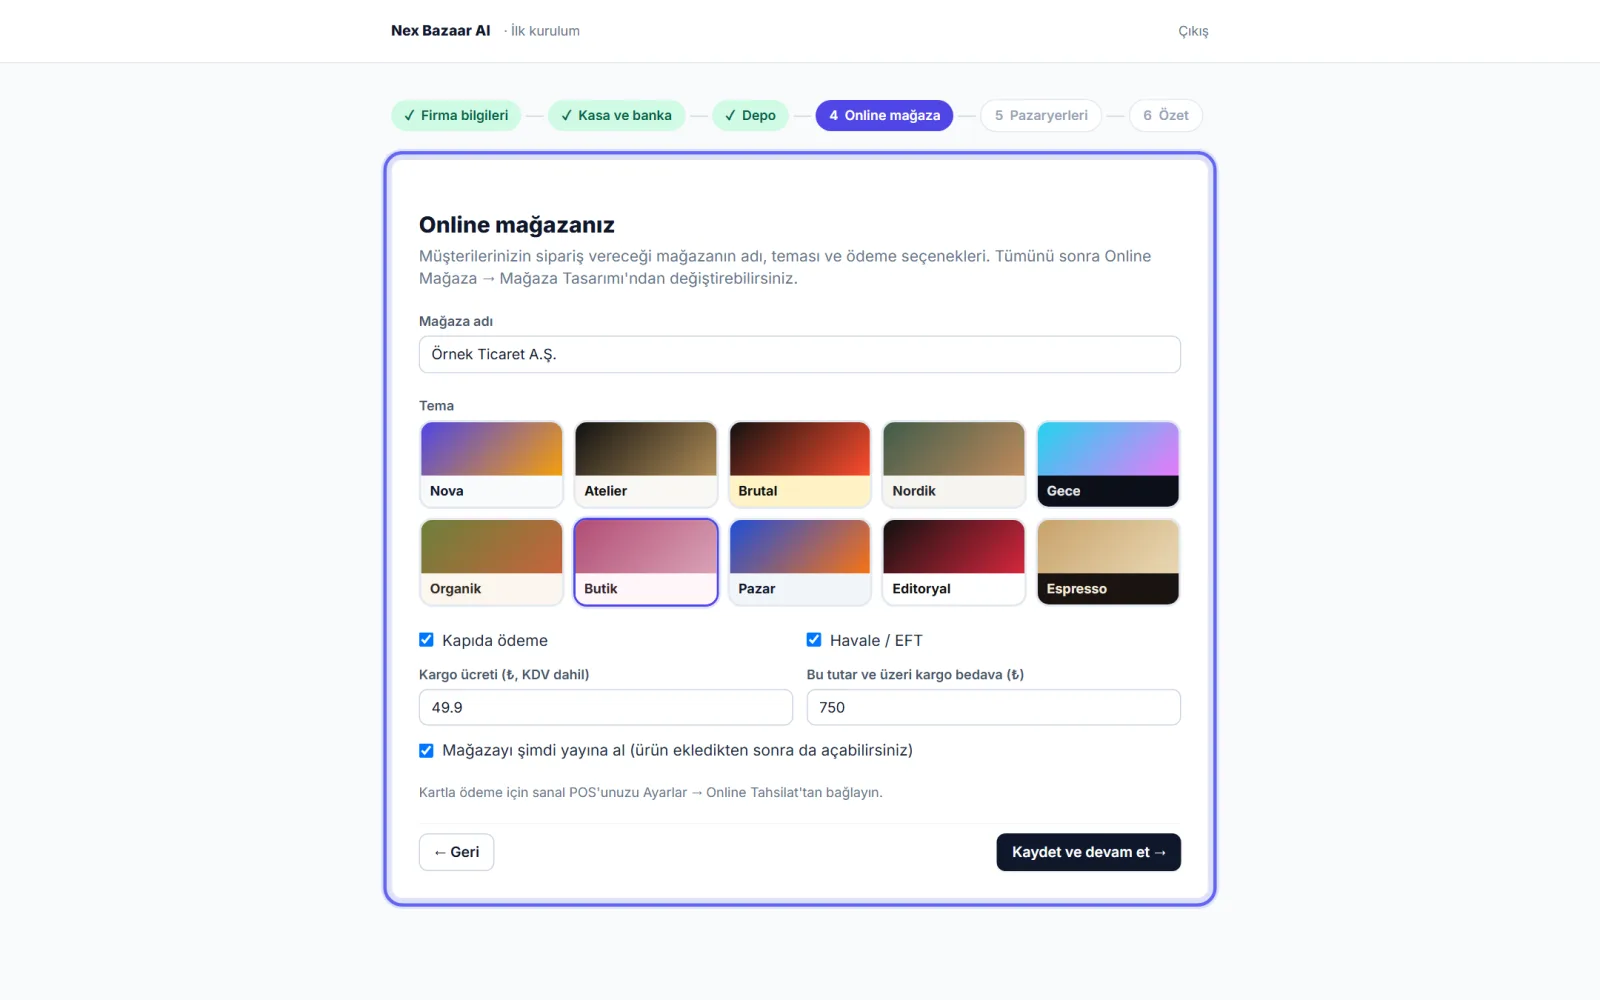
Online store and marketplace (depending on your package)
If your package includes an online store Your online store In the step, enter the store name, payment methods (Payment at the door, Wire Transfer / EFT), enter the shipping cost and the free shipping limit. In the marketplace package marketplaces step, you can open your stores after installation. E - Marketplace → Stores and Settings'dan bağlayacağınızı hatırlatır.
-
 Enlarge ⤢
6
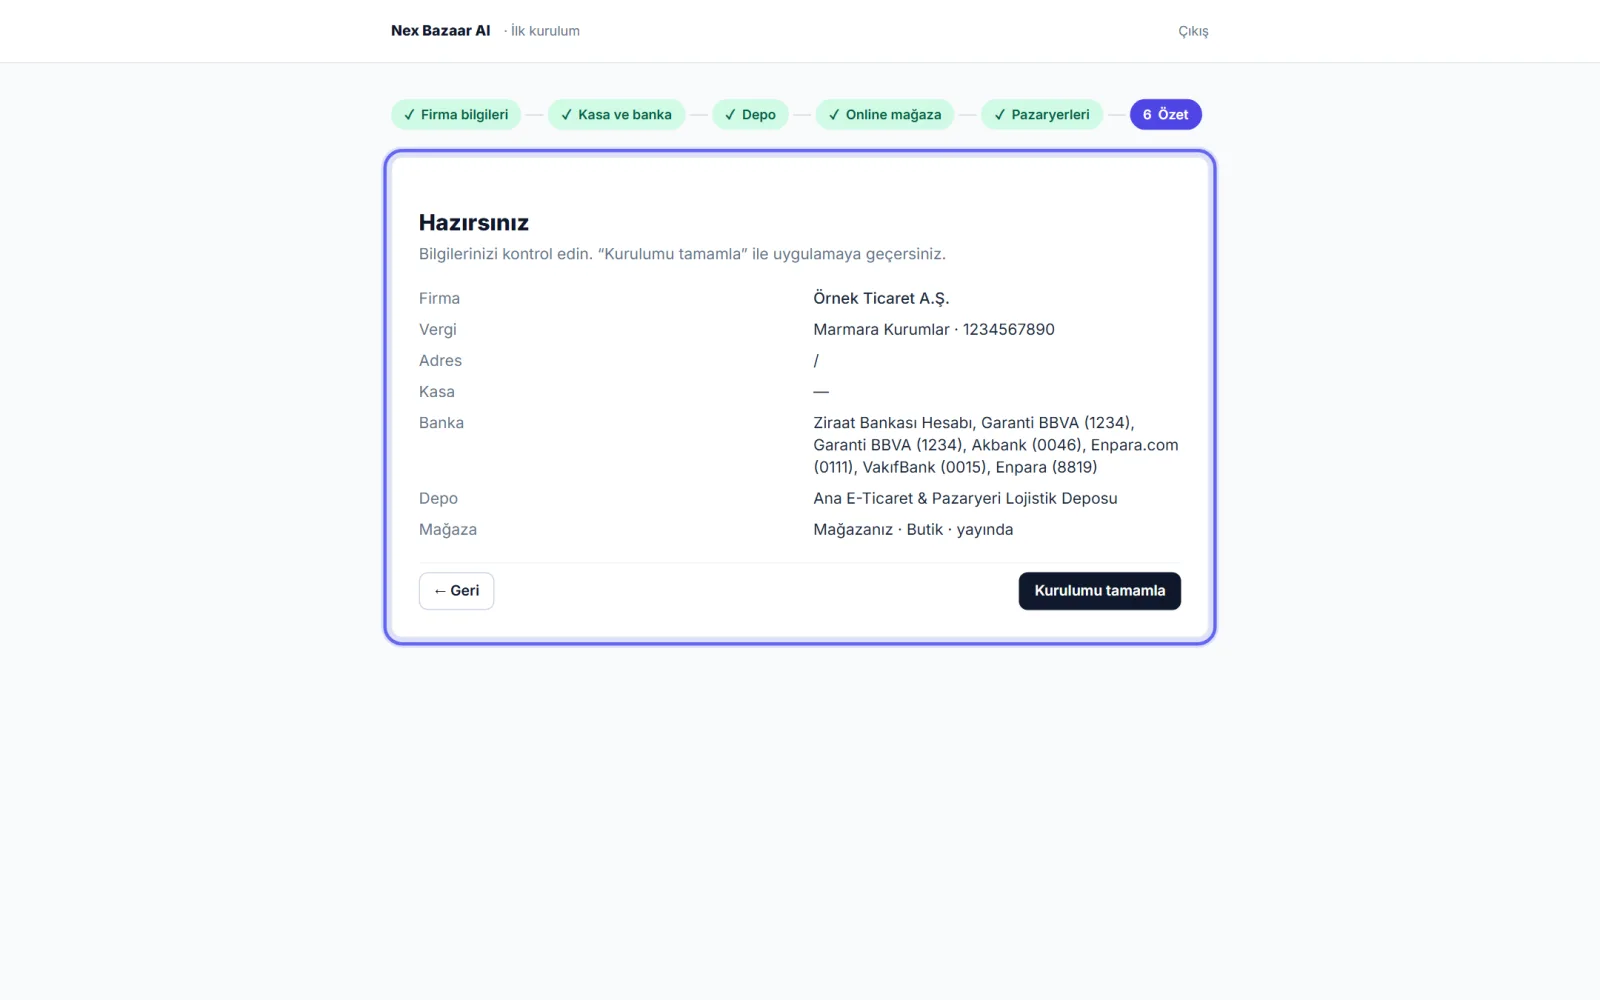
Check the summary and finish the installation
you are ready Check your information on the screen; to fix ← Back. Complete the installation You can go to the home page with . Company information later Ayarlar → Firma Bilgileri'nden değiştirebilirsiniz.
-
7
Add your products and customers
If you have an Excel list, do not enter it one by one: Products → Products and Services and Customers → Customer List on their screens 📤 Load from Excel ile kendi dosyanızı yükleyin; sütunlar otomatik tanınır. Ayrıntılar "Ürün, stok ve Excel aktarımı" ile "Müşteri ve tedarikçi (cari)" rehberlerinde.
-
8
Invite your team and accountant
Settings → Users and Authorizations'den çalışma arkadaşlarınızı rolleriyle ekleyin. Mali müşavirinizi Accountant → My Accountant (define)'dan ekleyin; muhasebeci kullanıcısı paket kullanıcı sınırına sayılmaz.
Common problems
Verification code not coming+
Numaranın doğru olduğundan emin olun (yanlışsa change number), bir dakika bekleyip Resend code'e basın (saatte en fazla 5 gönderim). Yine gelmezse WhatsApp destek hattımıza yazın.
e-Invoice preview gives an error+
Firma il ve ilçesi boşsa e-belge oluşturulamaz. Ayarlar → Firma Bilgileri'nden il ve ilçeyi seçin.
I left the wizard, it was left unfinished+
No problem: when you log in until the installation is complete, the wizard will open from the step where you left off.
Frequently asked questions
Which features are open during the trial period?+
During the 14-day trial, all features and limits of the package you choose during registration are open.
Can I change the information I entered during installation later?+
Yes. Company information is changed from Settings → Company Information, cash / bank Cash Management → Cash and Banks, warehouse Products → Warehouses screen.
I have more than one company, should I open a separate account?+
No; You can manage as many companies as the company limit of your package with the same user. You'll see the limit on the "My subscription and plan" page in the profile menu.